Apartments on the ground floor do not always have loggias. This is inconvenient, because... the amount of usable space is reduced. The situation can be corrected by adding the necessary structure. But for this you need to know how to attach a balcony on the first floor. The process includes several stages and begins with obtaining permission.
Rice. 1 Balcony on the ground floor with your own hands
Permission to build a balcony
The absence of balcony structures on the ground floor is due to a number of reasons. First of all, they note an increase in the load on the walls of the house. Another reason why balcony structures are abandoned is the reduction in the strength of the wall, because... Instead of a window opening, it is necessary to make a door. In some cases, due to design restrictions, the construction of remote structures on the ground floor is prohibited. If there is no strict prohibition, then you will need to develop a project and obtain a construction permit. You need to find out how to legalize a balcony and collect documents.
First, you should contact the appropriate inspectorate to find out whether it is possible to attach a balcony.
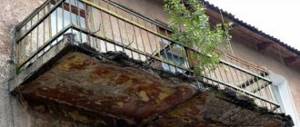
Rice. 2 Scheme and design of a balcony on the first floor
In some cases, it makes no sense to even start obtaining a permit; it will not be possible to legalize a balcony on the first floor. This happens if:
- the house is an architectural monument;
- the windows face the main street;
- it is necessary to destroy load-bearing walls during the construction process;
- Closely located underground communications.
In these cases, legalization by law is impossible.
If the construction of a loggia does not have direct prohibitions, then the collection of documents should begin by obtaining the consent of the neighbors. You should explain to them why you are adding a structure and whether it will worsen their conditions. It is better to provide consent in writing.
Judicial practice of legitimizing an attached balcony
Meanwhile, existing judicial practice does not always agree with the above. There are examples of incredible court decisions. For example, in one case, the court indicates that the addition of a balcony is a reconstruction of the building and since a construction permit or project has not been submitted, the plaintiff’s demand to preserve the balcony cannot be satisfied.
In another case, the court comes to the conclusion that the construction of a balcony without any permitting documentation is a redevelopment and reconstruction of the apartment and does not violate the rights of third parties, which means that the claim to preserve the apartment (with a balcony) in a redesigned and redesigned form must be satisfied.
Some courts in their decisions operate with both the concepts of “redevelopment, reconstruction” and “reconstruction”, however, in the end they consider the case applying the norms of Article 29 of the RF LC, and not the norms of Article 222 of the RF Civil Code on unauthorized construction.
Related article: Do you need light on the balcony?
There are examples of satisfaction of claims of apartment owners who built balconies and extensions without taking into account the norms of the Housing Code of the Russian Federation on common shared ownership of the land plot formed under the house. After all, formally, an extension cannot be legalized if it is located on a common plot of land in the absence of the consent of all owners of the premises of a residential building. Consent to the extension of a balcony only from the owners of neighboring apartments is not sufficient within the meaning of the law.
However, the rational component in such court decisions should also be taken into account. Formally, such decisions, to put it mildly, do not entirely correspond to the letter of the law, however, if the extension of the balcony does not violate anyone’s rights and interests and, according to the conclusions of specialists who examined the building, does not threaten life and health, it is carried out in accordance with construction, sanitary standards and rules, does not contradict fire safety requirements, then the legalization of such a balcony seems reasonable and rational, because an extension to the apartment improves the living conditions of citizens.
But the other side of the coin is less positive - the awareness of the possibility of legitimizing through the court the actual reconstruction of a building pushes a Russian person to the thought “first I’ll do it, then we’ll see.” After all, it must be admitted that not all extensions in the form of balconies and other structures comply with the requirements of building codes; some such “structures” can collapse at any time, and such cases exist in practice.
Further see the articles:
Return to the table of contents of the practice review: How to legalize a built balcony, roof, balcony canopy, balcony glazing, loggias, combine a room with a balcony? Arbitrage practice
Methods for building a balcony on the first floor
The construction of a balcony on the first floor is carried out in two ways. Supported and suspended structures are used.
Wall-mounted options are fixed to the walls using special brackets. They are attached to the wall using anchor bolts. A very wide structure cannot be built this way, but it will not touch the ground. This will free you from some of the approvals.
The structure on supports can be larger, because it has less impact on the wall. The maximum load is placed on the foundation elements (supports). If desired, you can arrange a basement below.
Suspended design option
To make a suspended balcony on the first floor, a project is required. It includes a drawing of the balcony, in accordance with which step-by-step work is carried out.
The basis of the design is a frame made of metal elements. The basis of the design are struts. They are right triangles. One side of such a triangle is attached to the wall, the second side will support the floor, and the third from the bottom creates a supporting rib.
Rice. 3 Hanging balcony on the first floor
All struts are assembled into a single support system using a lower bandage. Stands are attached to them on top, which will become the basis for the fence and the supporting element for the canopy. At the top, the racks are connected to each other by an upper bandage.
Rice. 4 To make a balcony, assemble the base
A fence is placed along the perimeter of the balcony structure. It must be at least a meter high from the floor level. The remaining space is filled with glazing or left open.
Do you want a balcony on the first floor? Change your apartment! Many people who want to build a balcony on the first floor come to this conclusion when they find out how this can be done legally.
– Today, the market value of a square meter of housing is such that the construction of a balcony, which costs around 4.5 thousand dollars, is impractical. It’s easier to sell one apartment and buy another - with a balcony. If the question concerns only drying clothes, it is cheaper to buy a washing machine with a dryer,” commented Sergei Valevich, chief specialist of the department of architecture and urban planning of the Vitebsk City Executive Committee . But for those who finally decided that there should be a balcony, Sergei Anatolyevich told how to proceed in order to build it in accordance with the law.
The balcony on the 1st floor must be of a cantilever structure within the boundaries of the balconies above
The addition of a balcony is part of the reconstruction work of a residential building. Each case is considered individually. In order not to waste time and money, it is better for the initiator to first seek advice from the city department of architecture and urban planning, where they will tell him how best to complete the project and whether it is worth pursuing it at all. If, from the point of view of architectural and urban planning requirements, it is possible to add a balcony, then the algorithm of actions is as follows.
First of all, the consent of at least 70% of the owners of the entire house is required, since the external structures of the house belonging to the household are alienated. To obtain the consent of the neighbors, you need to petition the ZhRET or the owners' association (depending on who owns the building) to hold a general meeting or visit all the apartments yourself.
Then you should submit a corresponding application to the “One Window” service of the district executive committee with the attached consent of the owners and other necessary documents.
After receiving permission from the district administration, the resident needs to find one from several dozen licensed design organizations that is suitable not only in price, but also so that it has the right to carry out projects for the reconstruction of multi-apartment residential buildings. Then the project must undergo state examination, because when constructing a balcony, the load-bearing structures of the house and safety are affected.
Next, you hire an official contractor, purchase materials, build a balcony, hand it over to a commission that looks at whether your structure complies with the developed project and accepts it for operation. Then you go to the BTI (the agency for state registration and land cadastre), where they reissue your registration certificate and receive a new registration certificate, since the area of the balcony is included in the total area of the apartment.
– In recent years, the Department of Architecture and Urban Planning, as a rule, allows the installation of a cantilevered balcony on the 1st floor: the metal support of the balcony slab does not rest on the ground, but is attached at an angle to the wall. This simplifies the procedure, because there is no need to deal with the allocation of land for construction. But the new structure must be clearly within the boundaries of the balconies above. All this is done so that the constructed balconies do not disturb the overall architectural appearance of the house and the city as a whole,” said Sergei Valevich.
By the way, the unauthorized addition of a balcony or in violation of the design is an administrative offense and entails a fine of 30 to 50 basic units, as well as a requirement to dismantle the structure.
When using materials from vitvesti.by, indicating the source and placing an active link to the publication is required
Intermediary services
Often people who want to add a balcony to their home turn to intermediary companies for help. This way it will be much calmer to wait for the upcoming construction, because you will not need to run through various authorities to obtain permits, the company will do everything for you.
Related article: Flower stand for the balcony
In addition,
experienced firms usually have their own connections in the relevant organizations , and obtaining permits there will be much easier for them than doing it yourself.
And the skills of the firm’s experienced lawyers will help to quickly legitimize an existing project if there are any reasons for refusal.
The services of such a company can be expensive ( another 60-100 thousand to the total cost ) and you should immediately decide for yourself whether the balcony is worth such costs.
Attention! You need to be careful when choosing an intermediary company and be wary if they offer to prepare all the documents in a couple of weeks. As a rule, this takes at least 4 months. Work only with trusted, experienced companies that have been on the market for similar services for a long time.
Procedure for obtaining permission
The attached structure must be legalized and included in the technical plan
First, you should order a balcony project from a specialized organization, because it is this technical documentation that will need to be submitted for approval to various interested authorities.
It is possible to build a balcony on the ground floor (as well as on other floors) after completing the approval procedure and obtaining permission to build the facility, so the finished project should be submitted to the local administration along with an application for redevelopment. It may take quite a long time to respond and obtain permission; usually such questions are considered for at least 1 month.
Related article: 5 main differences between a balcony and a loggia
Permission to redevelop premises (including loggias) must be obtained in accordance with the norms of the Housing Code of the Russian Federation (Article 25, paragraph 2), since the reconstruction will change the appearance of the building, entail a change in the area of the internal premises, and the work will have to be coordinated with the architecture department.
Technical plan of the building - a document that graphically displays information about the premises
The following documents are attached to the application:
- Documents on ownership of a residential apartment in a multi-storey building.
- Consent of neighbors of adjacent apartments, executed in writing.
- Technical passport for the apartment and floor plan of the building (first or other floors of the house on which it is planned to install a balcony).
- Application for reconstruction (construction) of a balcony with attached photographs of the facade of a residential building, in particular that part of it where it is planned to build attached structures.
- Permission from administrative authorities.
- Balcony project. Design documentation should be ordered from specialized organizations that have a license for design work.
- Coordination with supervisory organizations (carried out before submitting the project for approval with the administration): Rospotrebnadzor; State Fire Inspectorate; Department of Architecture; operating organizations; Committee for the Protection of Architectural Monuments (if the house is included in the list of buildings that are monuments of architectural heritage).
Balcony finishing
The final stage of redevelopment is the external finishing of the balcony. It not only makes it more aesthetically pleasing, but is also able to protect it from the harmful effects of external factors.
Wall decoration
The outer part of the walls of a balcony on the 1st floor of a panel house and not only of a house is often insulated using special weather-resistant paints as a finishing coating. The variety of their shades allows you to perfectly fit the balcony into the overall picture of the house.
The photo shows an attached balcony, painted in the color of the walls of a multi-story building
If the balcony is made of brick, then it can be left without external decoration, insulating the walls from the inside. Thanks to its texture, it will look good.
Ideally, it is best to use facing bricks, which, in principle, do not require a protective and decorative coating
The balcony can also be lined with clapboard, plastic or PVC. Their installation is quite simple and is done relatively quickly. The listed materials are wear-resistant. If any of the panels is damaged, it can be easily replaced without disassembling the entire structure.
Interior finishing options:
Wooden lining can be decorated at your discretion - coated with varnish, stain or coloring compound
Plastic and MDF panels already have a ready-made decorative finish
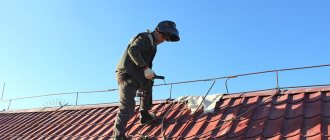
Roof finishing
If there is a need for a roof, but it cannot be used due to lack of space, a canopy is an alternative option. It can be single-pitch, gable, arched, domed. Each of them is used for balconies of different sizes, shapes and purposes.
Most often, corrugated sheets attached to a wooden or metal frame are used for a balcony roof.
The material for such hinged mini-roofs can be corrugated sheets, metal tiles, or slate. Although the latter is used less and less due to its significant weight.
Balcony on a strip foundation
Marking
The foundation can be laid out as shown in the diagram.
Marking for the foundation: a - free-standing balcony; b - balcony adjacent to the neighboring one. 1 - pegs; 2 - boards; 3 - twine or fishing line; 4 - wall of the house; 5 - balcony pair; 6 - wall of the adjacent balcony
On the wall you need to mark the place where the door to the balcony will be located.
Balcony door markings
Excavation work and organization of the cellar
Excavation work includes digging a trench for the foundation and a deepening for the cellar. The floor of the cellar must not be lowered below the level of the building foundation. After you have dug the cellar, you need to waterproof it with roofing felt, preferably in two layers. Then level the floor with expanded clay or sand, install a metal mesh and fill it with concrete. The thickness of the screed is at least 5 cm. After the screed has hardened, we erect the internal walls of the cellar. They can be pulled out of brick by laying them on edge.
The next stage is a trench for the foundation. Dig a trench 50 cm deep. The width of the trench should be more than 1.5 times the width of the future balcony wall. The foundation trench must reach the wall of the house or an adjacent balcony so that the foundation fits tightly against them. It is better to immediately remove the soil from the trench and cellar, as it will not be useful and will only clutter up the space at the construction site. A small layer of crushed stone (10–15 cm) is poured into the bottom of the trench and a sand cushion is made.
If you do not plan to build a cellar, then you can make a columnar base. You need to dig holes 0.5 m deep at a distance of no more than 2 m. Subsequently, make a concrete pad for the pillars.
Pouring the foundation
When making concrete, it is best to use crushed stone as a filler, as it is the purest material (as opposed to gravel). It is also good to use a plasticizer or other additive that has water-repellent and frost-resistant properties. Concrete with a plasticizer will be more dense and fluid, which will allow you to pour the foundation without air pockets. The strip foundation should dry on average for 3–4 weeks, then the walls can be erected. You can use ready-made concrete blocks as the foundation.
Construction of a balcony on a strip foundation: 1 - foundation of the house; 2 - strip foundation; 3 - half-brick brickwork; 4 - wall of the house; 5 - floor joists; 6 - balcony frame; 7 - second floor balcony slab
Making floors and erecting walls
Brick or aerated concrete blocks are mainly used as masonry material. The laying is done in one row. To make the floor, a subfloor (made of plywood, OSB or flat slate) is installed on logs made of timber. Then install a reinforcing mesh with a 10–15 cm window at a height of 5–6 cm from the subfloor. The reinforcing mesh must be located in the thickness of the slab and be mounted into the external wall of the house. If there is a descent from the balcony into the cellar, it must be fenced off or a hatch must be installed immediately. Fill the slab and let it dry for up to 4 weeks. Next, you can make a hole for the balcony door by removing the unnecessary part of the wall under the window using a hammer drill. We continue laying the walls, not forgetting about the external window block and doorway (if you plan to enter from the street). We extend the walls to a level that is slightly lower than the level of the second floor balcony in order to create a roof slope.